How To Fix Net Err_cert_date_invalid
Facing NET::ERR_CERT_DATE_INVALID Error in Google Chrome? Here are some solutions to fix this issue
Is the NET::ERR_CERT_DATE_INVALID error on your Google Chrome browser blocking you from accessing your favourite website? With over 51% of frequently visited websites using an SSL certificate, you are bound to come across SSL errors from time to time.
While some websites install SSL for SEO purposes, others are compelled to do so. Laws and regulations such as the GDPR in the European Union and the HIPAA in the US require website owners to implement security measures to protect user data.
Once the SSL is installed, most webmasters and administrators fail to keep track of its validity, leading to SSL errors.
Speaking of the ERR_CERT_DATE_INVALID also known as "Your Connection is Not Private" error, it is one such SSL glitch that occurs when there is a problem with the date of the certificate and the system or both.
With that said, let's find out how website owners and Chrome users can troubleshoot this issue.
Let's first discuss if it is worth your time and effort!
NET::ERR_CERT_DATE_INVALID error – Can you ignore it?
So as to deliver a superior user experience and better security, the Chrome browser shows many security warnings. So, the golden rule for secure internet browsing is never to ignore nor bypass SSL security warnings, especially when it shows up on your Google Chrome Browser, which is trusted by over 66% of internet users worldwide.
However, there are times when you would want to bypass these security warnings, but can you ignore them? No! you need to know the risk involved.
A website that does not have a valid SSL certificate does not offer client-server encryption. So, your interaction with the website can be intercepted by cybercriminals.
This makes it risky to exchange sensitive data such as login credentials, personal or financial information, etc.
However, if you are researching some topic and wish to read something on a website that shows the NET::ERR_CERT_DATE_INVALID error, the risk is minimal.
Let us now discuss how you can fix or in some cases, bypass the NET ERR_CERT_DATE_INVALID error.
How to Fix the NET ERR_CERT_DATE_INVALID error on the Chrome Browser?
We shall now explore ways to fix this SSL error on your Google Chrome Browser.
#1. Correct the date and time on your PC or Mobile Device
Incorrect time and date on your device can trigger this SSL error, so start by fixing it. We strongly recommend that you set an automatic time, date, and time zone. So, even if you are traveling, the device would automatically detect it.
To do that on Windows PC:
Step #1: Go to the Control Panel via the Start Menu

Step #2: Click on the 'Clock and Region' option.
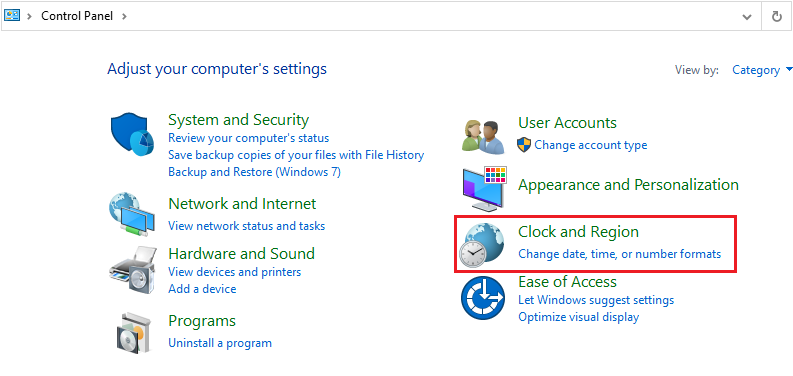
Step #3: Click on 'Set the Date and Time'.

Step #4: Click on the 'Internet Time' tab.
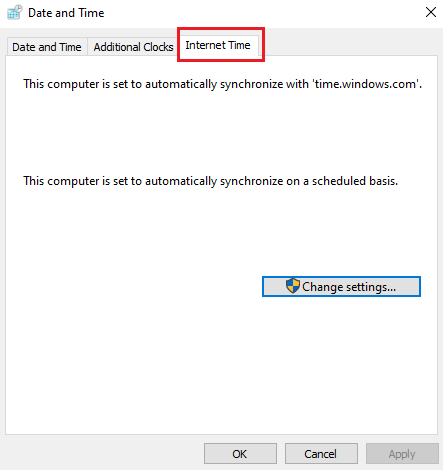
Step #5: Click on 'Change Settings'.
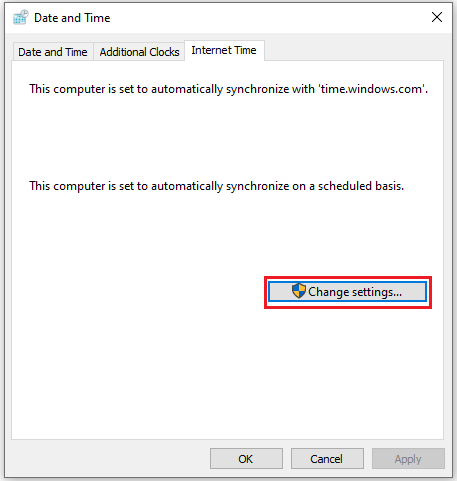
Step #6: Select the checkbox next to 'Synchronize with an Internet Time Server'.
Step #7: Click OK.
To do that on Mac PC:
Step #1: Click on the 'Apple Menu' and Navigate to 'System Preferences'.
Step #2: Click on the 'Date and Time' option and set it to automatic.
Step #3: Next, set the time zone to automatic.
To do that on Android Device:
Step #1: Go to the Settings Option and choose 'Additional Settings'.
Step #2: Click on the 'Date and Time' option.
Step #3: Select the toggle button next to 'Use network-provided time' and 'Use network-provided time zone'.
To do that on an iOS Device:
Step #1: Find the Settings option and choose 'General'.
Step #2: Click on 'Date and Time'.
Step #3: Now select the 'set automatically' option.
2. Configure your DNS
Your DNS servers resolve the domain name to IP addresses, and sometimes changing this can fix many errors so that it might work for the ERR_CERT_DATE_INVALID error. So, try replacing your current DNS server with that of Google.
To change your DNS on Windows, follow the below-mentioned steps:
Step #1: Go to the control panel and click on the 'Network and Internet' option.
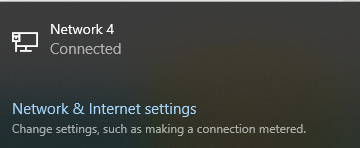
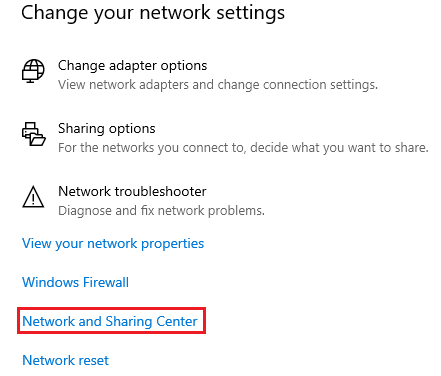
Step #2: Click on the 'Network and Sharing Center'.
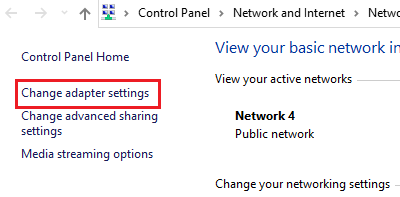
Step #3: Select the 'Change Adapter Settings' option.
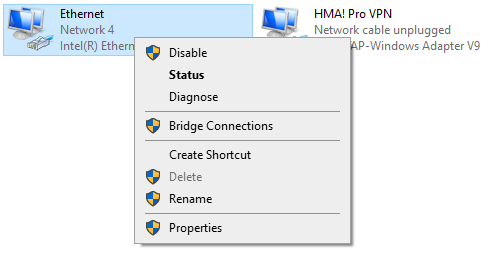
Step #4: Right-click on the network you are currently using and select 'Properties'.
Step #5: Click on Internet Protocol Version 4 (TCP/IPv4) and click on 'Properties'.
Step #6: Select the 'Use the following DNS server address' option and enter the following Google DNS
Step #7: 8.8.8.8
Step #8: 8.8.4.4
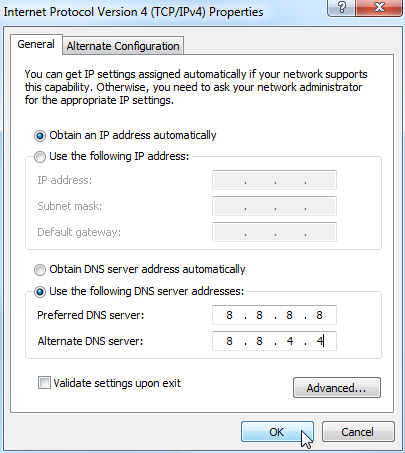
Step #9: Then click OK and Restart your PC.
3. Remove Extensions and other Applications
If you use Google Chrome, you may have experimented with browser extensions, and one of those could be obstructing the SSL connectivity. You can experiment with that by opening the same website in an incognito window. If the website opens there, it only means that your regular Chrome Window has a faulty Chrome extension that needs to be uninstalled.
To remove Chrome Extension:
Step #1: Click on the three vertical dots on the top-right corner.
Step #2: Click on the 'Settings' option.
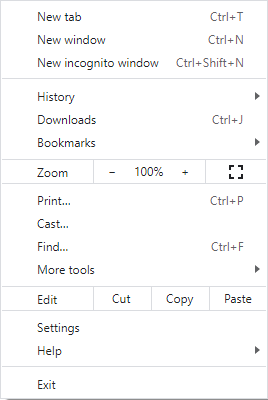
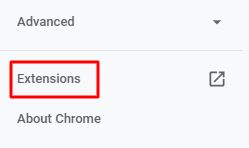
Step #3: Click on 'Extensions' and uninstall the one that could be interfering with the SSL's functioning.
The same could happen in the case of software applications on the PC or device. So, consider uninstalling the most recently installed software applications that you suspect to be troublesome.
To remove a Software Application on Windows.
Step #1: Press the Windows button.
Step #2: Type 'Control Panel' in the search bar and click on it.
Step #3: Under Programs, click on 'Uninstall a Program'.
Step #4: Single click on whichever application you wish to uninstall.
Step #5: Click on Uninstall and confirm the action by clicking on 'Yes'.
4. Empty your Chrome Browser's Cache and Cookies
Every time you visit a website, those traces remain on your browser in the form of cache and cookies. These are temporary files that can, at times, cause SSL errors.
To clear cache and cookies:
Step #1: Open the Chrome Browser and click on the three vertical dots on the top-right corner.
Step #2: Select 'Settings'.
Step #3: Click on 'Privacy and Security'.
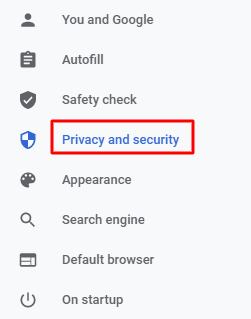
Step #4: Reset the time range to 'All Time'.
Step #5: Select 'Browsing History', 'Cookies and other site data', and 'Cached images and files'.
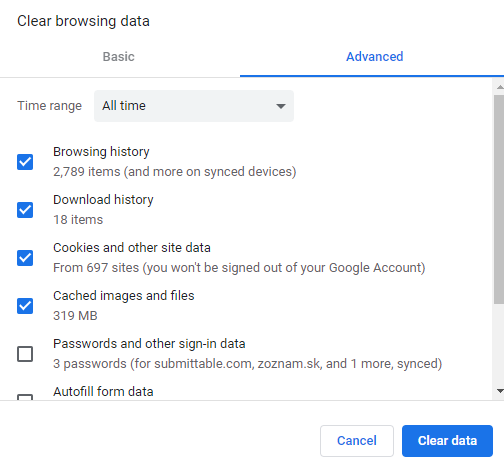
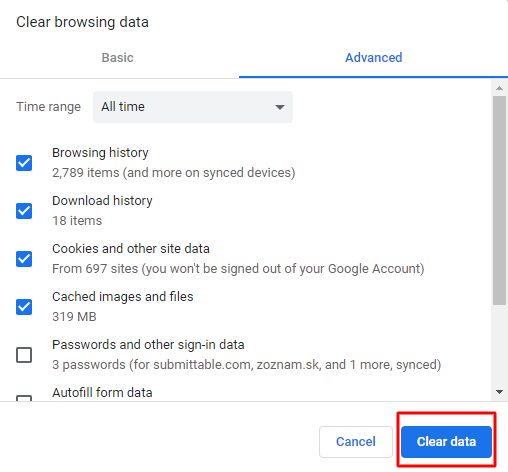
Step #6: Click on 'Clear Data'.
Step #7: Close the browser and relaunch it.
What Should Website Owners do about the NET ERR_CERT_DATE_INVALID error?
If you own a website that shows up the ERR_CERT_DATE_INVALID error, check your SSL certificate's validity.
If you installed a freebie that came bundled with the web hosting plan, you must know that those free certificates usually remain valid for 90 days only, after which you must renew it.
On the other hand, if you or your developer has installed one from a reliable source, you still need to know that SSL certificates remain valid for a maximum of two years only.
Conclusion
We have discussed some of the simplest but effective Chrome users' methods to fix the NET ERR_CERT_DATE_INVALID error.
However, if the issue crops up due to an expired certificate, users can only report it to the website owner and wait for it to be fixed.
In the meantime, users may choose to bypass the warnings, but this involves a certain amount of security risk.
Recommended Reading:
- NET::ERR_CERT_AUTHORITY_INVALID
- NET::ERR_CERT_COMMON_NAME_INVALID
- NET::ERR_CERT_REVOKED
- ERR_CONNECTION_REFUSED
- ERR_BAD_SSL_CLIENT_AUTH_CERT
- ERR_SSL_BAD_RECORD_MAC_ALERT
- ERR_SSL_VERSION_INTERFERENCE
- SSL_ERROR_RX_RECORD_TOO_LONG
How To Fix Net Err_cert_date_invalid
Source: https://www.clickssl.net/blog/neterr-cert-date-invalid
Posted by: readytommand.blogspot.com

0 Response to "How To Fix Net Err_cert_date_invalid"
Post a Comment